Search Results for: pi NTP server

5 minute guide to making a GPS Locked Stratum 1 NTP Server with a Raspberry Pi

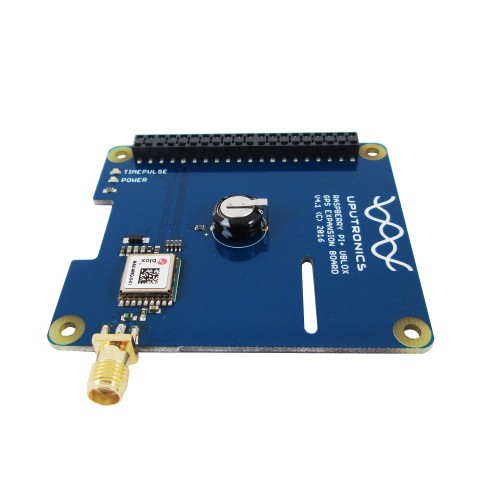
This is an article on making a network attached Stratum 1 NTP Server using a Raspberry Pi+ Model 2 or 3 and the Uputronics Raspberry Pi+ GPS Expansion Board. If you need a standalone ready to go solution or need more performance please consider the LeoNTP Networked Time server unit which is available here.

Due to significant changes to Raspbian we have decided to retire the old guide here https://ava.upuaut.net/?p=726 and redo it.This guide assumes Raspbian Stretch Lite November 2018 released 2018-11-13. No other version or distribution is supported.

This solution will not give you a standalone off grid NTP server. NTP isn’t designed to work off grid using just the NMEA derived time and PPS to discipline it. You need an external server and then use PPS to discipline it.

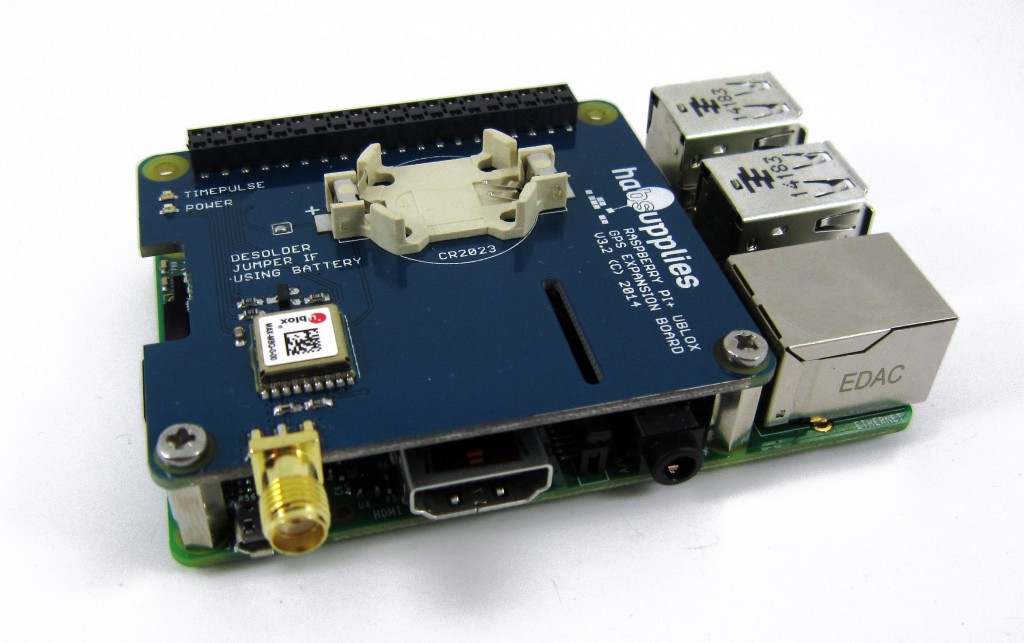
Uputronics Raspberry Pi+ GPS Expansion Board

Ideally rather than supplying a premade image I would have a set of concise instructions on making your own install from scratch so you could use the latest versions of the software. With assistance from David Taylor who did lots of background work on this here I present the following instructions on making a cheap PPS disciplined NTP Time server using one of the Raspberry Pi+ GPS boards sold on Uputronics.

The guide assumes you have a cursory knowledge of Linux, enough to install Raspbian and login should do.

You will need a Raspberry Pi 2 or 3 B+, the Uputronics Raspberry Pi+ GPS Expansion Board and a suitable GPS antenna.

This guide is assuming you’re using Raspbian Stretch Lite November 2018 released 2018-11-13 image. Download and write this to an SD card (See http://www.raspberrypi.org/documentation/installation/installing-images/README.md). Other distributions may work but these instructions are known to work with Raspbian Stretch Lite.

Attach the Uputronics Raspberry Pi+ GPS Expansion Board to the Pi, insert the SD card, connect the antenna and network cable and boot the Pi up. Either connect locally or via SSH to the Pi (If you can’t SSH in and don’t have a monitor see this https://www.raspberrypi.org/documentation/configuration/wireless/headless.md)

Follow the instructions carefully if you miss steps things won’t work.

Text in italics is what you type.
Text in red indicates editing inside a file.

Prerequisite Settings

sudo raspi-config
5 Interfacing Options
P2 SSH -> Would you like the SSH server to be enabled – YES (Recommended)
P6 Serial -> Login Shell (no) Hardware (yes) (Optional)
Quit but no need to reboot at this point.

sudo nano /boot/config.txt
Add at the bottom :

dtoverlay=pps-gpio,gpiopin=18
Save and Quit Nano.

sudo apt-get update
sudo systemctl disable hciuart
sudo systemctl mask [email protected]
sudo apt-get install pps-tools ntp dnsutils
sudo reboot

Verifying PPS Is Working

Ensure the GPS has a lock and the Green PPS LED on the Uputronics Pi+ GPS Expansion Board is blinking once a second.

dmesg | grep pps

Output should be similar to :

[ 2.443494] pps_core: LinuxPPS API ver. 1 registered
[ 2.446699] pps_core: Software ver. 5.3.6 - Copyright 2005-2007 Rodolfo Giometti <[email protected]>
[ 2.471796] pps pps0: new PPS source pps.-1
[ 2.471886] pps pps0: Registered IRQ 498 as PPS source
[ 6.965166] pps_ldisc: PPS line discipline registered
[ 6.966569] pps pps1: new PPS source ttyAMA0
[ 6.966664] pps pps1: source "/dev/ttyAMA0" added

sudo ppstest /dev/pps0

Output should be similar to:

 trying PPS source "/dev/pps0"
 found PPS source "/dev/pps0"
 ok, found 1 source(s), now start fetching data...
 source 0 - assert 1418933982.998042450, sequence: 970 - clear  0.000000000, sequence: 0
 source 0 - assert 1418933983.998045441, sequence: 971 - clear  0.000000000, sequence: 0

(Press CTRL+C to quit). This indicates the PPS Module is loaded (top example) and is working (bottom).

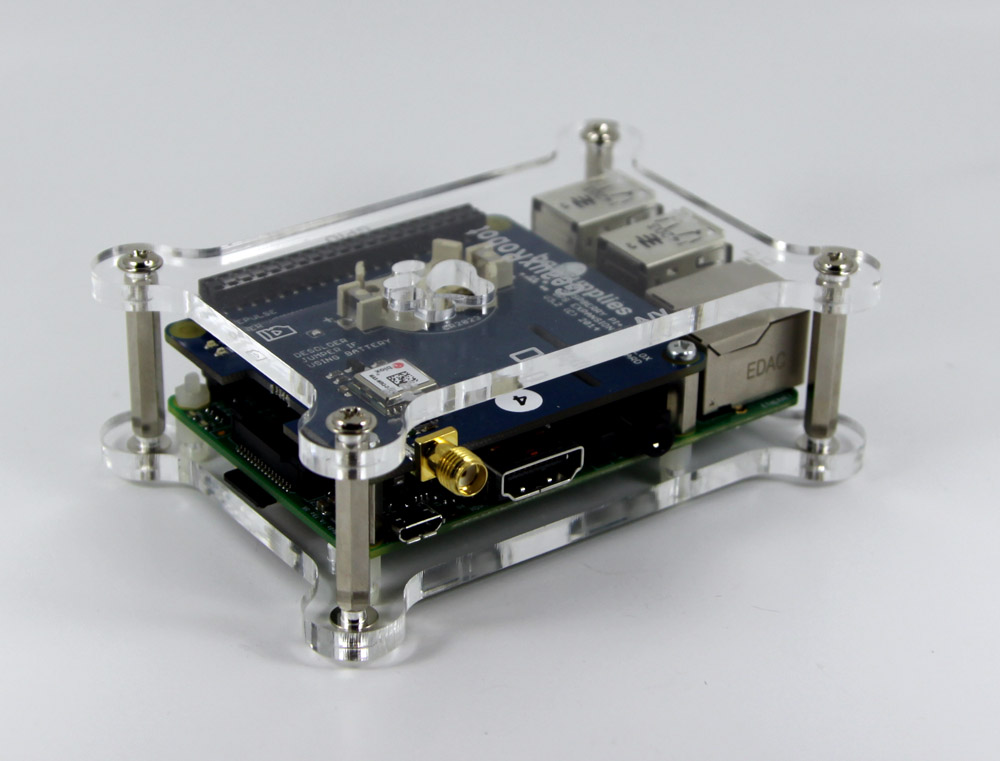
GPS board mounted in Geaux Robot Dog Bone Case for Raspberry Pi B+ also available from HAB Supplies

GPS board mounted in Geaux Robot Dog Bone Case for Raspberry Pi B+ also available from Uputronics

Enabling PPS/ATOM Support in NTPD

The supplied version of NTPD on the Raspberry Pi now supports PPS so there is no need to roll your own NTP.

You need to pick a few local NTP servers to use. The easiest way to do this is pick your region:

https://support.ntp.org/bin/view/Servers/NTPPoolServers
Select your region then you get a list of the country servers. E.g for the UK its uk.pool.ntp.org.
Type:

dig uk.pool.ntp.org

You will get four IP’s back:

; <<>> DiG 9.10.3-P4-Raspbian <<>> +answer uk.pool.ntp.org
;; global options: +cmd
;; Got answer:
;; ->>HEADER<<- opcode: QUERY, status: NOERROR, id: 51647
;; flags: qr rd ra; QUERY: 1, ANSWER: 4, AUTHORITY: 0, ADDITIONAL: 1

;; OPT PSEUDOSECTION:
; EDNS: version: 0, flags:; udp: 4000
;; QUESTION SECTION:
;uk.pool.ntp.org. IN A

;; ANSWER SECTION:
uk.pool.ntp.org. 24 IN A 193.150.34.2
uk.pool.ntp.org. 24 IN A 176.58.109.199
uk.pool.ntp.org. 24 IN A 195.195.221.100
uk.pool.ntp.org. 24 IN A 185.53.93.157


sudo nano /etc/ntp.conf
Add
server 127.127.22.0 minpoll 4 maxpoll 4
fudge 127.127.22.0 flag3 1 refid PPS
tos mindis 0.2

Comment out all the pool lines:

#pool 0.debian.pool.ntp.org iburst
#pool 1.debian.pool.ntp.org iburst
#pool 2.debian.pool.ntp.org iburst
#pool 3.debian.pool.ntp.org iburst

Add the four servers from the dig command with the top one saying prefer on it:

server 193.150.34.2 iburst prefer
server 176.58.109.199 iburst
server 195.195.221.100 iburst
server 185.53.193.157 iburst

You may also want to add your local lan to so you can query the NTP Server by adding:
restrict 192.168.1.0 mask 255.255.255.0

Note You MUST add a preferred server or PPS doesn’t work. Its worth at this point seeing if you’re ISP has its own NTP server you can use and adding that.

Save and close nano.

sudo service ntp restart

After a few minutes run

ntpq –p

if you get oPPS(0) this indicates source selected, Pulse Per Second (PPS) used and everything is working.

If you aren’t seeing the settings its possible the NTP server is picking up the NTP information via DHCP which is over riding your settings above. Do this :

rm /etc/dhcp/dhclient-exit-hooks.d/ntp
rm /var/lib/ntp/ntp.conf.dhcp

At this point you have a NTP server which will use an external time source and use your local PPS to discipline it.

Setting Stationary Mode

Grab this small program code here : https://pastebin.com/YTc9Nd3D
Compile + link:

gcc -o gpsControl gpsControl.c

sudo ./gpsControl -p -d /dev/ttyAMA0 = Portable Mode
sudo ./gpsControl -s -d /dev/ttyAMA0 = Stationary Mode

May take a few goes to set it.

pi@hypatia:~ $ sudo ./gpsControl -s -d /dev/ttyAMA0
Set GPS for stationary mode
Configuring device /dev/ttyAMA0
>>>>>>>>>>>>>>>>>>>>> SENDING >>>>>>>>>>>>>>>
GPS mode set OK

Static IP + Hostname

If you want to fix your LAN IP you do it by amending /etc/dhcpcd.conf adding the following lines:

interface eth0
static ip_address=192.168.1.7/24
static routers=192.168.1.254
static domain_name_servers=8.8.8.8 8.8.4.4

Amend your hostname by editing /etc/hostname and then adding this to /etc/hosts as well. I.e if you call your machine ‘eleanor’ add this after localhost in /etc/hosts:

127.0.0.1 localhost eleanor

Further Reading

David Taylor’s website here http://satsignal.eu/ntp/Raspberry-Pi-NTP.html goes into much further detail about the process above and covers graphing, remote access monitoring etc and I highly recommend you read it.

Hope this helps, let me know how you get on with these instructions and I’ll try keep them up to date.

Thanks to:

David Taylor
Dave Akerman
sout + others on #ntp irc.freenode.org

5 minute guide to making an GPS synchronised NTP Server based on a Pi


Superseded by this http://ava.upuaut.net/?p=726

These instructions no longer work please review the article above.


EDIT : I’ve confirmed the version of NTP provided in the Open Chaos download below isn’t susceptible to the DRDoS / Amplification Attack using ntpdc monlist command discussed here : http://web.nvd.nist.gov/view/vuln/detail?vulnId=CVE-2013-5211

Working in IT I’m aware of how keeping accurate time is important, generally most of the time we will point our devices / equipment at uk.pool.ntp.org however there may be situations where a local time source is preferable. This can be for a number of reasons,  where no internet is available, radio amateur’s doing meteor scatter etc.

David Taylor from Satsignal.eu has done a comprehensive write up of getting the Pi to work as a Stratum-1 NTP Server. Taking this work Hauke Lampe has created an image with all the hard work done. With no compiling to be done its possible to get a Pi working with as a Stratum 1 NTP Server in less than five mins.

First you need a Raspberry Pi GPS Addon board available at Hab Supplies. Secondly you need a patch antenna (see related products). Thirdly get the minimal SD-card image based on Raspberry Pi’s Raspbian “wheezy” distribution featuring PPS-enabled kernel and ntpd by Hauke here :

http://ntpi.openchaos.org/downloads/

Pop the image on an SD Card. Plug in the antenna and the GPS board and power on the Pi.

Thats it really it will boot up and work as an NTP Server.

ntpi-2

I run the following commands as well :

sudo apt-get update
sudo apt-get install raspi-config (Use Raspi-config to resize fs)
sudo apt-get upgrade
sudo apt-get install gpsd-clients

Please be aware if there is a new kernel it may over write the Kernel with PPS support in it. You can from here install SNMP, monitoring as per Davids page here : http://www.satsignal.eu/ntp/Raspberry-Pi-NTP.html

A nice cheap very accurate time server for less than £100!

NTPi – Raspberry Pi as a Stratum-1 NTP Server Hardware Part 2

Having had a chat with a number of people about my previous LEA based NTPi board here http://ava.upuaut.net/?p=581 a few things were apparent. Firstly designing a board to fit a Pi you’ve removed the composite header from was silly and not checking it on a stock Pi the board results in it not fitting. Secondly the LEA based board is probably more complex that most people need for a Pi based NTP server.

The new positioning modules from Ublox the MAX-7 series are cost effective high performance and provide the PPS output needed for accurate time keeping. I set about designing a simpler board around the MAX-7Q module.

The MAX-7Q positioning module features a RTC Crystal, very low power usage and high performance. Although not a true timing module it is more than adequate for a Pi based NTP Server. Its worth noting the module can, with a serial command, be placed in “Stationary” dynamic mode which is the default mode for the much more expensive timing modules.

Also of note is the PPS output can be, again with serial commands, be increased to an output of up to 10Mhz for other applications.

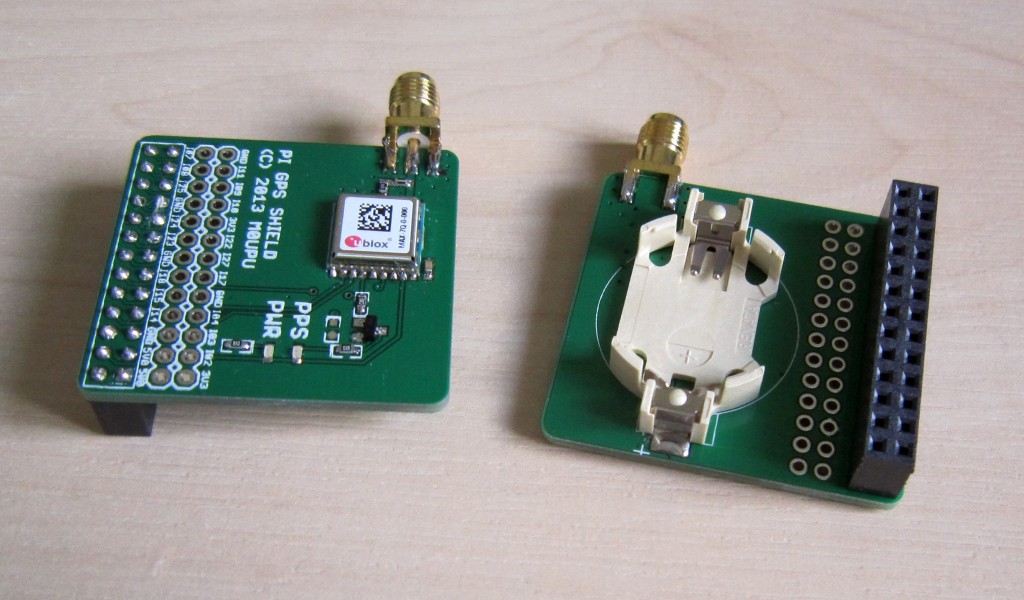
To keep the board simple it just features the MAX-7Q, a Raspberry Pi header, battery, power and PPS LED’s and provision for an SMA connected active patch antenna (puck) :

ntpi-1

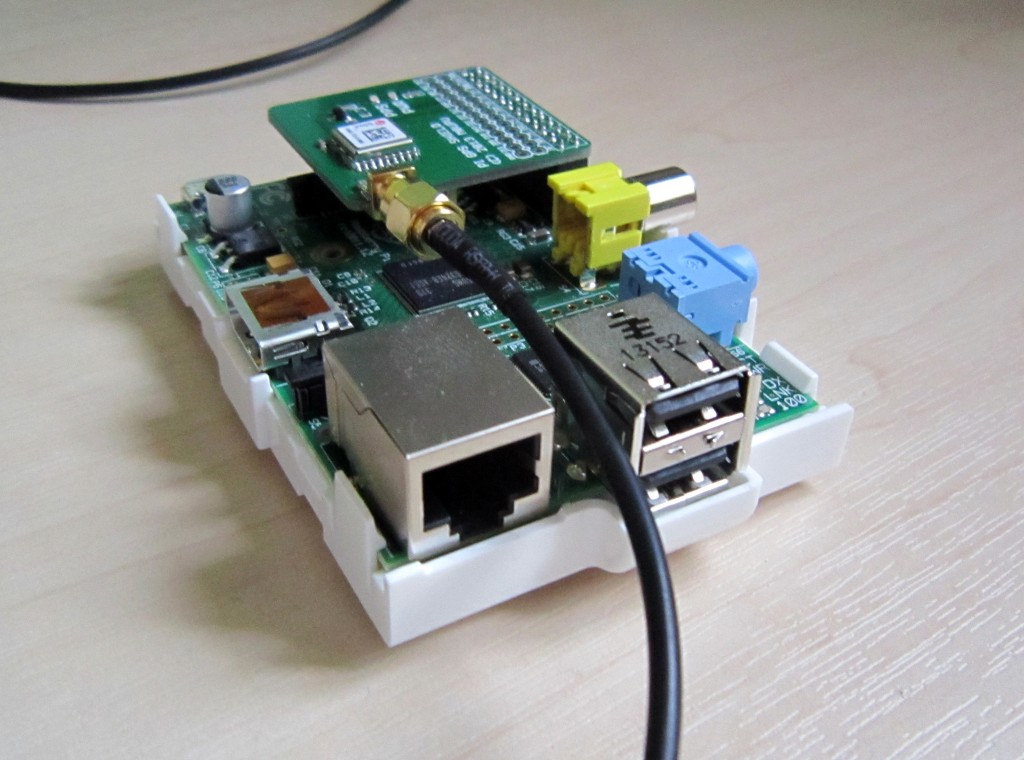
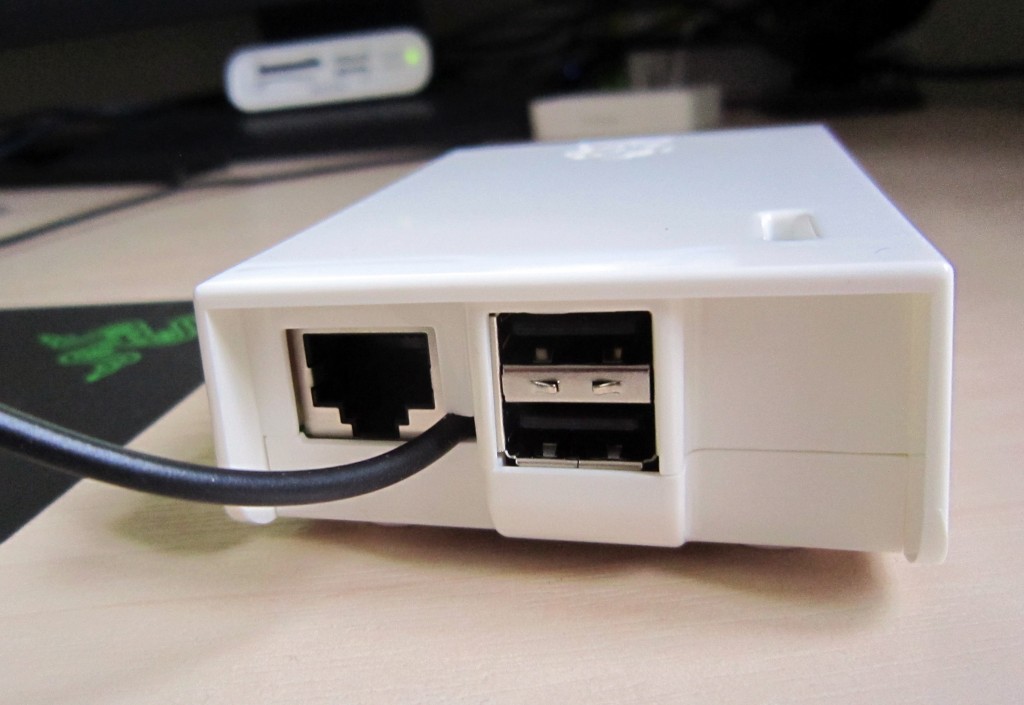
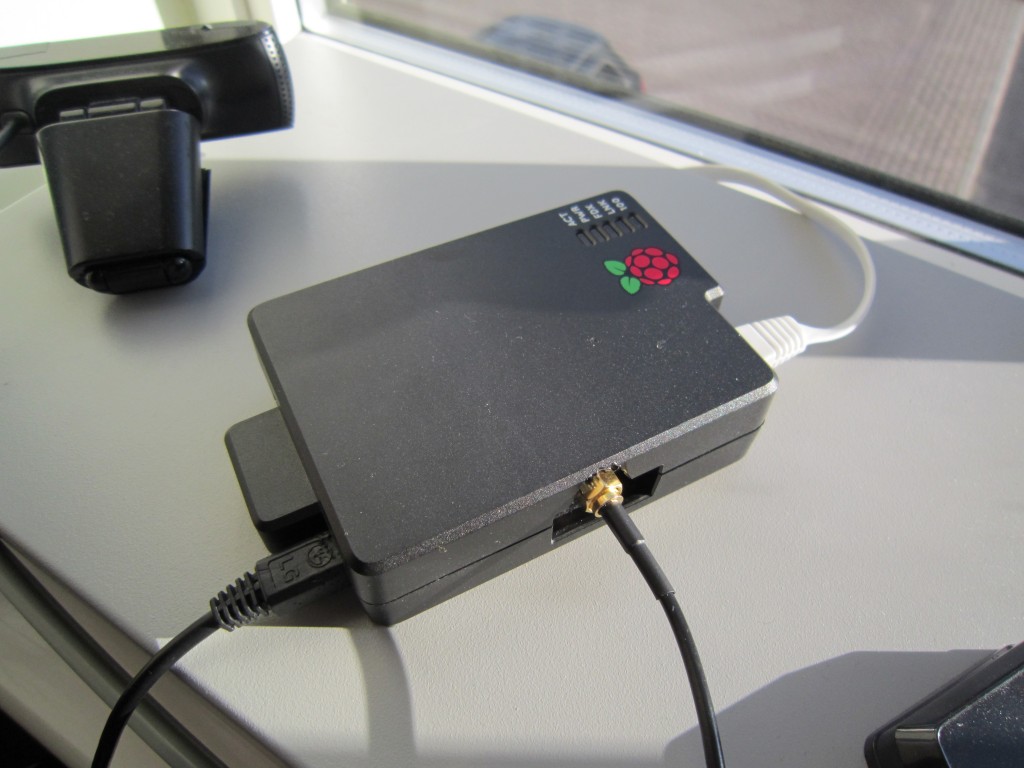
The MAX-7Q is connected via serial to the Pi and the PPS is connected to GPIO18 (pin 12). The design is such that it should fit in a case (I’ve only tested it in the Multicomp MC-RP001). The Pi GPIO’s are passed through to an unpopulated header should you wish to connect other items to the Pi. When in place the antenna cable exits between the USB and RJ45 connectors :

ntpi-2A simple snip of the case with some wire cutters allows the top to be attached :

ntpi-3

Resulting in a nice tidy NTP Server. The made up boards can be purchased from HAB Supplies here http://ava.upuaut.net/store/index.php?route=product/product&path=59_60&product_id=95

I haven’t intended this board to be used in Pi powered HAB stuff due to the way the Pi interfaces with radio the GPS needs to connect via I2C. This board connects the GPS via serial so please bear that in mind.

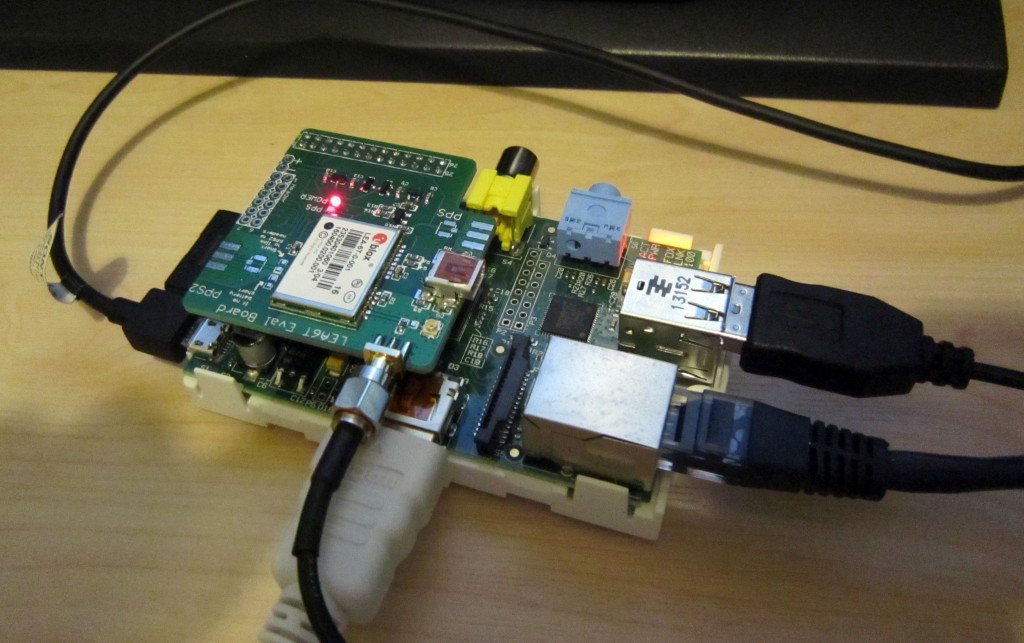
I also took the opportunity to fix the design fault with the LEA eval board and can also supply these with LEA-6T timing modules or LEA-5S modules as needed. The LEA eval board is designed as more of a multipurpose board featuring PPS and (where LEA-6T fitted) PPS2 outputs. SMA or u.FL inputs. USB to connect to a PC, Pi header to connect to a Pi, generic header for other uses. Board can be powered by header, USB or Pi header. The board does fit in a Pi case but its tight and the antenna exits over the HDMI :

ntpi-4If this board is of interest leave me a message and I’ll contact you to discuss your requirements.

NTPi – Raspberry Pi as a Stratum-1 NTP Server Hardware

David Taylor over at Satsignal.Eu has done a wonderful article on turning your Raspberry Pi into a Stratum 1 NTP server. A Stratum 1 NTP server is one that is connected directly to a Stratum-0 device such as a GPS. I made an initial device up based one of the Ublox GPS modules from Hab Supplies however with its passive antenna and limited wiring it had to be near a window to work.

Also the MAX6Q GPS modules used aren’t designed for timing applications, however that said I achieved a fairly reasonable level of accuracy of 6ms. I decided to make up a PCB to utilise the proper timing module the LEA-6T this would act as an evaluation board featuring USB for connection to a PC, separate outputs for the PPS and PPS2 finally it would feature a header to permit direct connection to the Raspberry Pi.

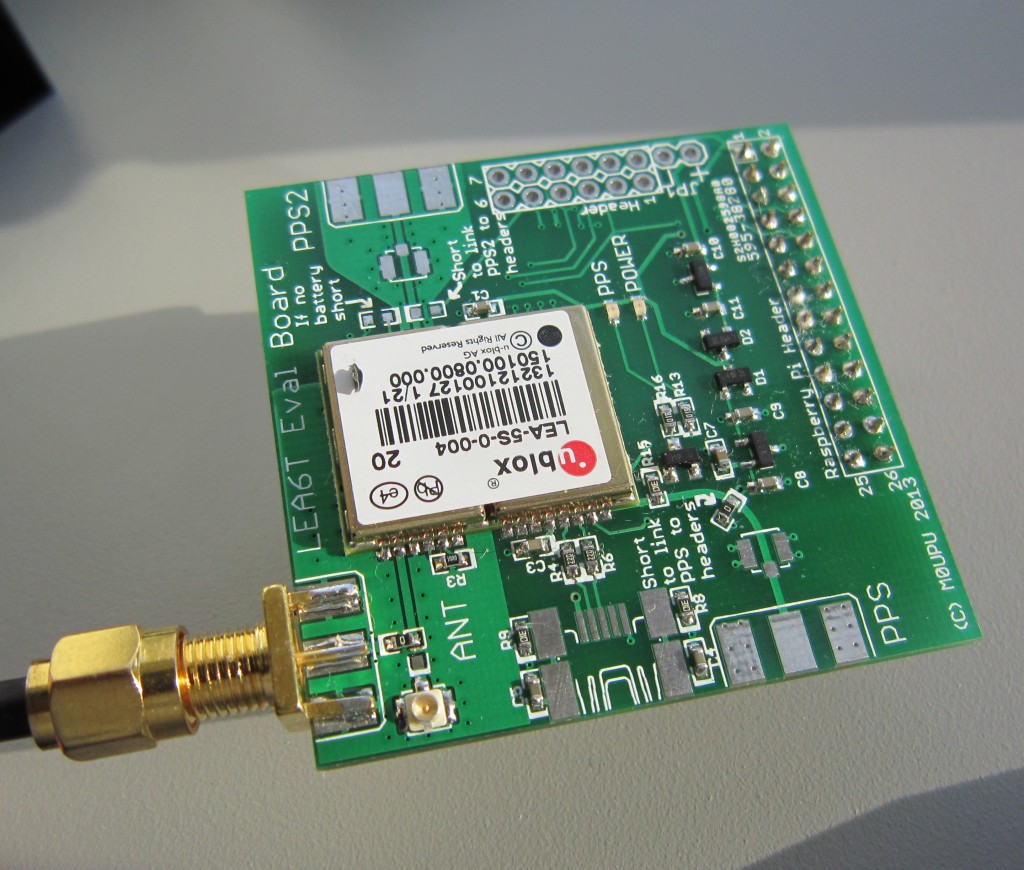
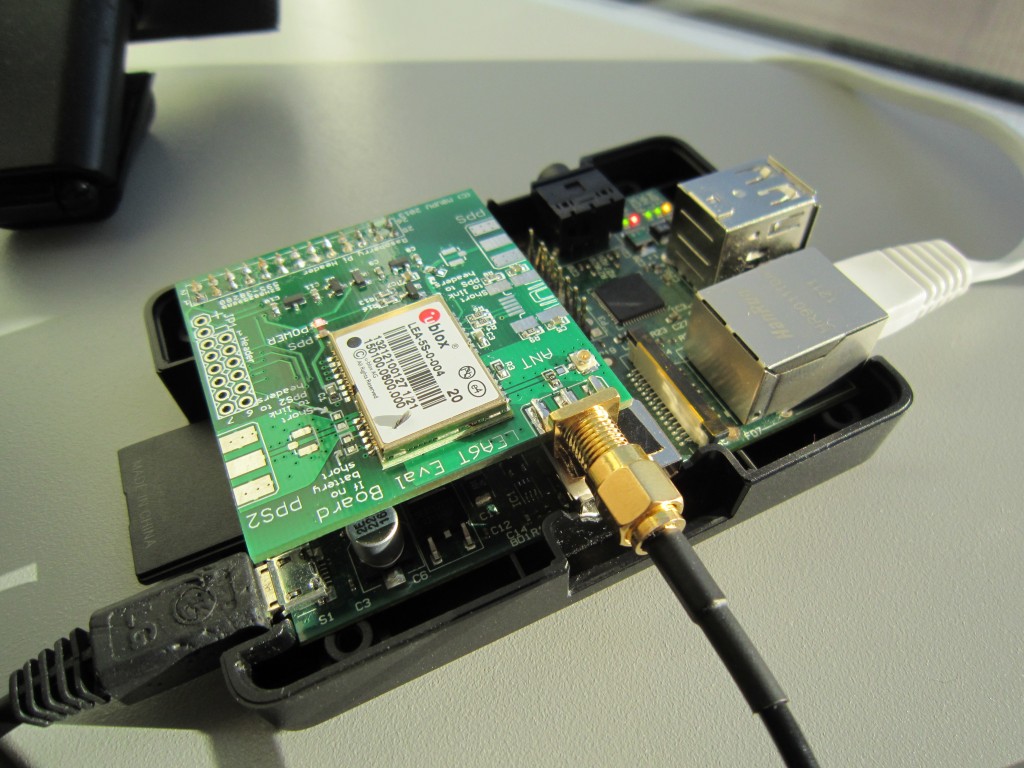
Osmocom have designed a PCB which is similar however I have enhanced it a little with a PPS LED, Raspberry Pi header and I changed the regulators as the LEA doesn’t need the larger regulators. Additionally the Osmocom part for the LEA had some very odd solder mask on it and had to be redone.IMG_1937Here you can see the board with an LEA-5S on for testing. Although it looks similar to the Osmocom part the board was designed from scratch this fits on the Pi :IMG_1934The case still fits on nicely (with a little modification!) :IMG_1935

I‘ve released this board as open source and its on Github here. I do have some spare PCB’s free which I can supply to your spec with either a LEA-5S fitted or the LEA-6T. PCB’s are £3.50 , boards assembled with LEA-5S are £40.00 and with the 6T £100.00. Send me a comment if this is of interest, these boards will be built to spec.

A Stratum 1 NTP server for £50 is a bit of a bargin!

Not quite 5 minute guide to making an NTP Server

THIS ARTICLE HAS BEEN DEPRECIATED AND INSTRUCTIONS CONTAINED BELOW NO LONGER WORK WITH LATEST RASPBIAN. HOWEVER GOOD NEWS – ITS MUCH EASIER NOW SEE HERE:

https://ava.upuaut.net/?p=951

This is an article on making a network attached Stratum 1 NTP Server using a Raspberry Pi+ Model 2 or 3 and the Uputronics Raspberry Pi+ GPS Expansion Board. If you need a standalone ready to go solution or need more performance please consider the LeoNTP Networked Time server unit which is available here.

As of May 2016 this was heavily reworked due to a new version of Raspbian which did all sorts of wonderful things like disabling the serial ports etc. This guide assumes Raspbian Jessie Lite June 2017 2017-06-21. No other version or distribution is supported.

I’ve also removed the off grid/standalone instructions as NTP isn’t designed to work off grid using just the NMEA derived time and PPS to discipline it.

HAB Supplies Raspberry Pi+ GPS Expansion Board

Uputronics Raspberry Pi+ GPS Expansion Board

Ideally rather than supplying a premade image I would have a set of concise instructions on making your own install from scratch so you could use the latest versions of the software. With assistance from David Taylor who did lots of background work on this here I present the following instructions on making a cheap PPS disciplined NTP Time server using one of the Raspberry Pi+ GPS boards sold on Uputronics.

The guide assumes you have a cursory knowledge of Linux, enough to install Raspbian and login should do.

You will need a Raspberry Pi 2 or 3 B+, the Uputronics Raspberry Pi+ GPS Expansion Board and a suitable GPS antenna.

This guide is assuming you’re using Raspbian Jessie Lite installed from the June 2017 image. Download and write this to an SD card (See http://www.raspberrypi.org/documentation/installation/installing-images/README.md). Other distributions may work but these instructions are known to work with Raspbian Jessie Lite.

Attach the Uputronics Raspberry Pi+ GPS Expansion Board to the Pi, insert the SD card, connect the antenna and network cable and boot the Pi up. Either connect locally or via SSH to the Pi. Follow the instructions carefully if you miss steps things won’t work.

Text in italics is what you type.
Text in red indicates editing inside a file.

Prerequisite Settings

sudo raspi-config
5 Interfacing Options
P2 SSH -> Would you like the SSH server to be enabled – YES (Recommended)
P6 Serial -> Login Shell (no) Hardware (yes)
Quit but no need to reboot at this point.

sudo nano /boot/config.txt
Add at the bottom :
# Allow the normal UART pins to work
dtoverlay=pi3-miniuart-bt
dtoverlay=pps-gpio,gpiopin=18
Save and Quit Nano.

sudo apt-get update
sudo apt-get dist-upgrade

sudo systemctl disable hciuart
sudo systemctl mask [email protected]

sudo apt-get install pps-tools
sudo apt-get install libcap-dev
sudo reboot

Verifying PPS Is Working

Ensure the GPS has a lock and the Green PPS LED on the Uputronics Pi+ GPS Expansion Board is blinking once a second.

dmesg | grep pps

Output should be similar to :

[ 2.443494] pps_core: LinuxPPS API ver. 1 registered
[ 2.446699] pps_core: Software ver. 5.3.6 - Copyright 2005-2007 Rodolfo Giometti <[email protected]>
[ 2.471796] pps pps0: new PPS source pps.-1
[ 2.471886] pps pps0: Registered IRQ 498 as PPS source
[ 6.965166] pps_ldisc: PPS line discipline registered
[ 6.966569] pps pps1: new PPS source ttyAMA0
[ 6.966664] pps pps1: source "/dev/ttyAMA0" added

sudo ppstest /dev/pps0

Output should be similar to:

 trying PPS source "/dev/pps0"
 found PPS source "/dev/pps0"
 ok, found 1 source(s), now start fetching data...
 source 0 - assert 1418933982.998042450, sequence: 970 - clear  0.000000000, sequence: 0
 source 0 - assert 1418933983.998045441, sequence: 971 - clear  0.000000000, sequence: 0

(Press CTRL+C to quit). This indicates the PPS Module is loaded (top example) and is working (bottom).

GPS board mounted in Geaux Robot Dog Bone Case for Raspberry Pi B+ also available from HAB Supplies

GPS board mounted in Geaux Robot Dog Bone Case for Raspberry Pi B+ also available from Uputronics

Enabling PPS/ATOM Support in NTPD

The supplied version of NTPD on the Raspberry Pi doesn’t support PPS so we need to recompile it (Please note that some of these steps may take up to 30 minutes).

wget https://www.eecis.udel.edu/~ntp/ntp_spool/ntp4/ntp-4.2/ntp-4.2.8p10.tar.gz
tar zxvf ntp-4.2.8p10.tar.gz
cd ntp-4.2.8p10
./configure  –enable-lcap
make -j4
sudo make install
sudo service ntp stop
sudo cp /usr/local/bin/ntp* /usr/bin/ && sudo cp /usr/local/sbin/ntp* /usr/sbin/
sudo nano /etc/ntp.conf

Add
server 127.127.22.0 minpoll 4 maxpoll 4
fudge 127.127.22.0  flag3 1  refid PPS

Amend

server 0.debian.pool.ntp.org iburst prefer

You may also want to add your local lan to so you can query the NTP Server by adding:
restrict 192.168.1.0 mask 255.255.255.0

Note You MUST add a preferred server or PPS doesn’t work. Its worth at this point seeing if you’re ISP has its own NTP server you can use and adding that but for the purposes of this exercise adding prefer to the Debian pool one will do.

Save and close nano.

sudo nano /etc/init.d/ntp
Find the line NTPD_OPTS=”$NTPD_OPTS -u $UGID”
Amend it to say NTPD_OPTS=”$NTPD_OPTS”

sudo systemctl daemon-reload

sudo service ntp restart

After a few minutes run

ntpq –p

if you get oPPS(0) this indicates source selected, Pulse Per Second (PPS) used and everything is working.

If you aren’t seeing the settings its possible the NTP server is picking up the NTP information via DHCP which is over riding your settings above. Do this :

rm /etc/dhcp/dhclient-exit-hooks.d/ntp
rm /var/lib/ntp/ntp.conf.dhcp

At this point you have a NTP server which will use an external time source and use your local PPS to discipline it.

Setting Stationary Mode

Grab this small program code here : https://pastebin.com/YTc9Nd3D
Compile + link:

gcc -o gpsControl gpsControl.c

sudo ./gpsControl -p -d /dev/ttyAMA0 = Portable Mode
sudo ./gpsControl -s -d /dev/ttyAMA0 = Stationary Mode

May take a few goes to set it.

pi@hypatia:~ $ sudo ./gpsControl -s -d /dev/ttyAMA0
Set GPS for stationary mode
Configuring device /dev/ttyAMA0
>>>>>>>>>>>>>>>>>>>>> SENDING >>>>>>>>>>>>>>>
GPS mode set OK

Static IP + Hostname

If you want to fix your LAN IP you do it by amending /etc/dhcpcd.conf adding the following lines:

interface eth0
static ip_address=192.168.1.7/24
static routers=192.168.1.254
static domain_name_servers=8.8.8.8 8.8.4.4

Amend your hostname by editing /etc/hostname and then adding this to /etc/hosts as well. I.e if you call your machine ‘eleanor’ add this after localhost in /etc/hosts:

127.0.0.1 localhost eleanor

Further Reading

David Taylor’s website here http://satsignal.eu/ntp/Raspberry-Pi-NTP.html goes into much further detail about the process above and covers graphing, remote access monitoring etc and I highly recommend you read it.

References from this draft document by Eric S. Raymond https://www.ntpsec.org/white-papers/stratum-1-microserver-howto/

Hope this helps, let me know how you get on with these instructions and I’ll try keep them up to date.

Thanks to:

David Taylor
Dave Akerman
Chris Stenton for the new kernel fix.
Tris Mabbs for the DHCP issue heads up.
Michiel Kanis for testing DHCP fix.
Phil Heron for the GPSD Autostart fix.

Updated : 27/06/17 Fixed for new June 2017 Raspbian. Updated links to ntp-4.2.8p10.
Updated : 25/05/16 Fixed for Pi3/May Raspbian. Removed Standalone mode (NTP isn’t designed for this)
Updated : 22/03/16 Added Pi3/Standalone etc
Updated : 24/02/16 Added Code to set stationary mode.
Checked : 29/09/15 Works with Raspian Jessie – Thx Ciaran!
Updated : 03/07/15 NTP version and location amended – Thx Greg!
Checked : 13/06/15 Works with 2015-05-05-raspbian-wheezy.img
Updated : 13/04/15 ntp-4.2.8p2.tar.gz links updated.
Updated : 23/02/15 Verified these instructions are good with 2015-02-16-raspbian-wheezy.img as a base
Updated : 20/02/15 ntp-4.2.8p1.tar.gz links updated.
Updated : 28/01/15 DHCP Client can pick up NTP from DHCP server and override all your good work. See below.
Updated : 27/01/15 New kernel breaks previous instructions. Updated.
Updated : 26/12/14 Updated NTP to 4.2.8 and tested with Raspbian 2014-12-14